The Kith Guide › Crafting & RE
🛡 Armor Designer
Layer segments and cores, roll a full set, and see your mitigation before you craft.
The Armor Designer plans a full Restoration 3 armor set and shows the final protection values, encumbrance totals, and socket count. It opens in Simple mode — pick an armor type and a protection focus and you're done — with an Advanced mode for entering exact per-piece stats and managing saved builds.
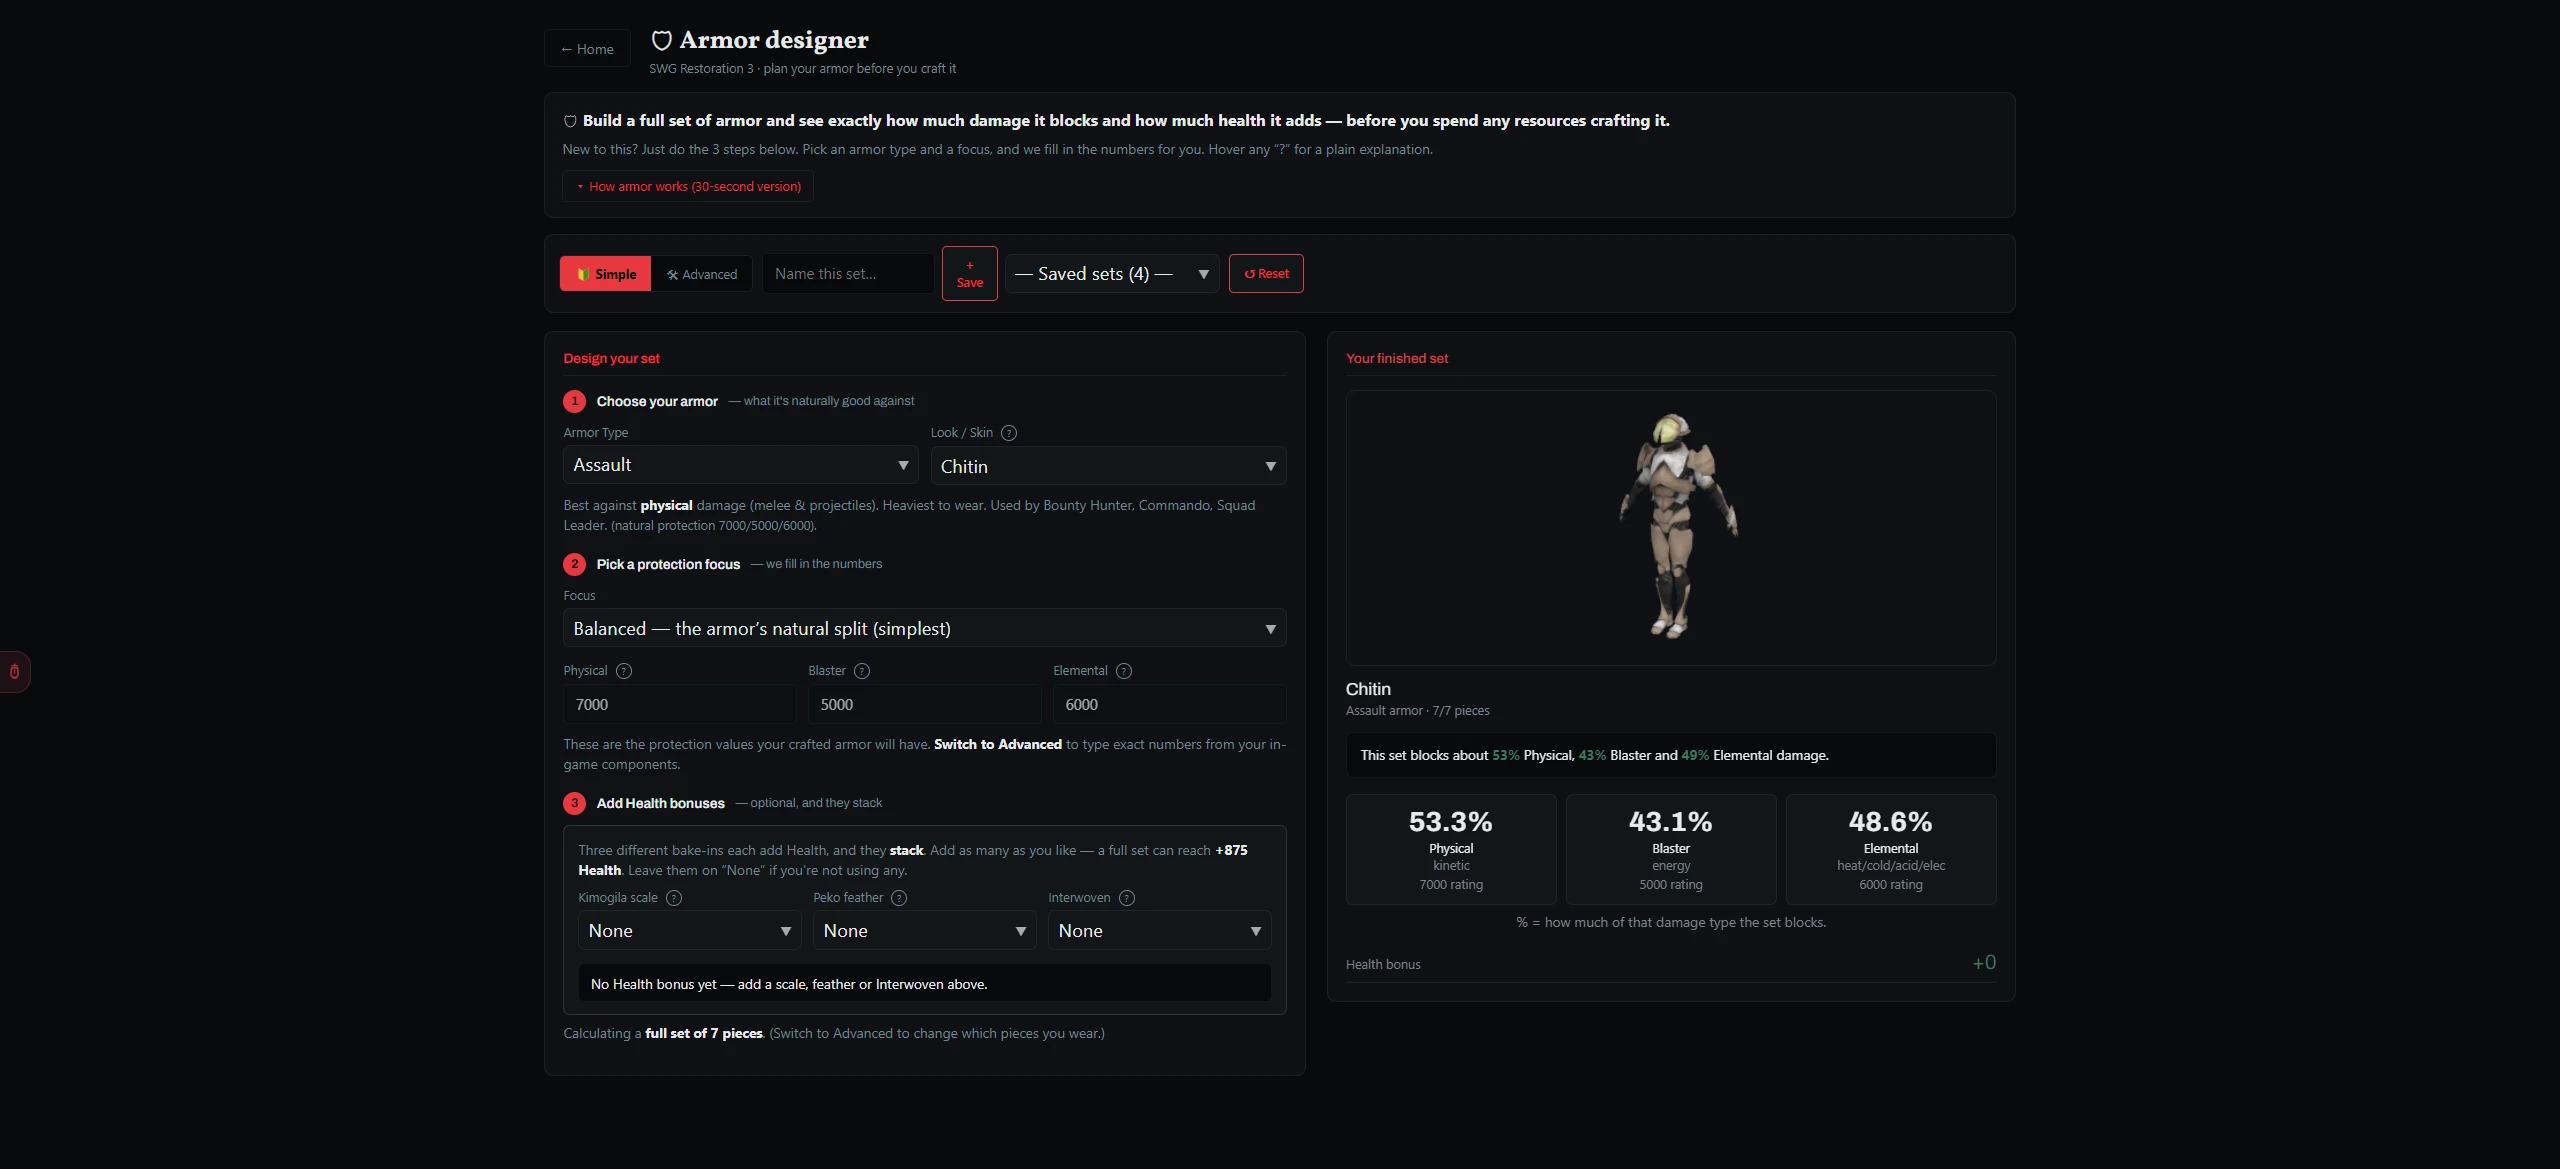
A toggle at the top switches between 🔰 Simple (the default) and 🛠 Advanced. In Simple mode the protection inputs are read-only — you choose an armor type and a focus preset and the tool fills in sensible values. Switch to 🛠 Advanced to type exact stats per piece and to access build management.
- Choose your armor — pick the armor type from the dropdown (e.g. Assault, Battle, Reconnaissance).
- Pick a Look / Skin — the cosmetic schematic for the set. Some skins drop arm slots: Ubese drops the two bicep slots (the bracers stay), and Mabari drops both biceps and bracers.
- Pick a protection focus — use the Focus preset dropdown to weight the set toward the damage types you care about.
- Add Health bonuses — choose from the Segment scale, Peko feather, and Interwoven dropdowns; each adds Health and they stack.
- A standard suit is 7 pieces: chest, leggings, helmet, two biceps, and two bracers. (Ubese drops the two biceps; Mabari drops both biceps and bracers.)
- In 🛠 Advanced mode, set your Armor Assembly under Extras — 160 or higher gives every piece a socket for an SEA tape.
- The Your finished set panel updates live, showing total protection by damage type. Encumbrance totals appear in 🛠 Advanced mode.
+ Save, the Saved sets dropdown, and ↺ Reset are always available. The rest of the toolbar — Duplicate, Delete, Export, Import, Compare — appears in 🛠 Advanced mode and works the same as the Weapon Designer. Export files use the .barmor extension.