The Kith Guide › Crafting & RE
⚔ Weapon Designer
Assemble cores, components and enhancers, and read the final weapon before you craft it.
The Weapon Designer simulates the Restoration 3 NGE weapon crafting system so you can plan a build before spending resources. Enter your finished component stats, set the Combat Level, and see the final weapon output — damage range, socket chance, and all derived values — before you craft a single piece.
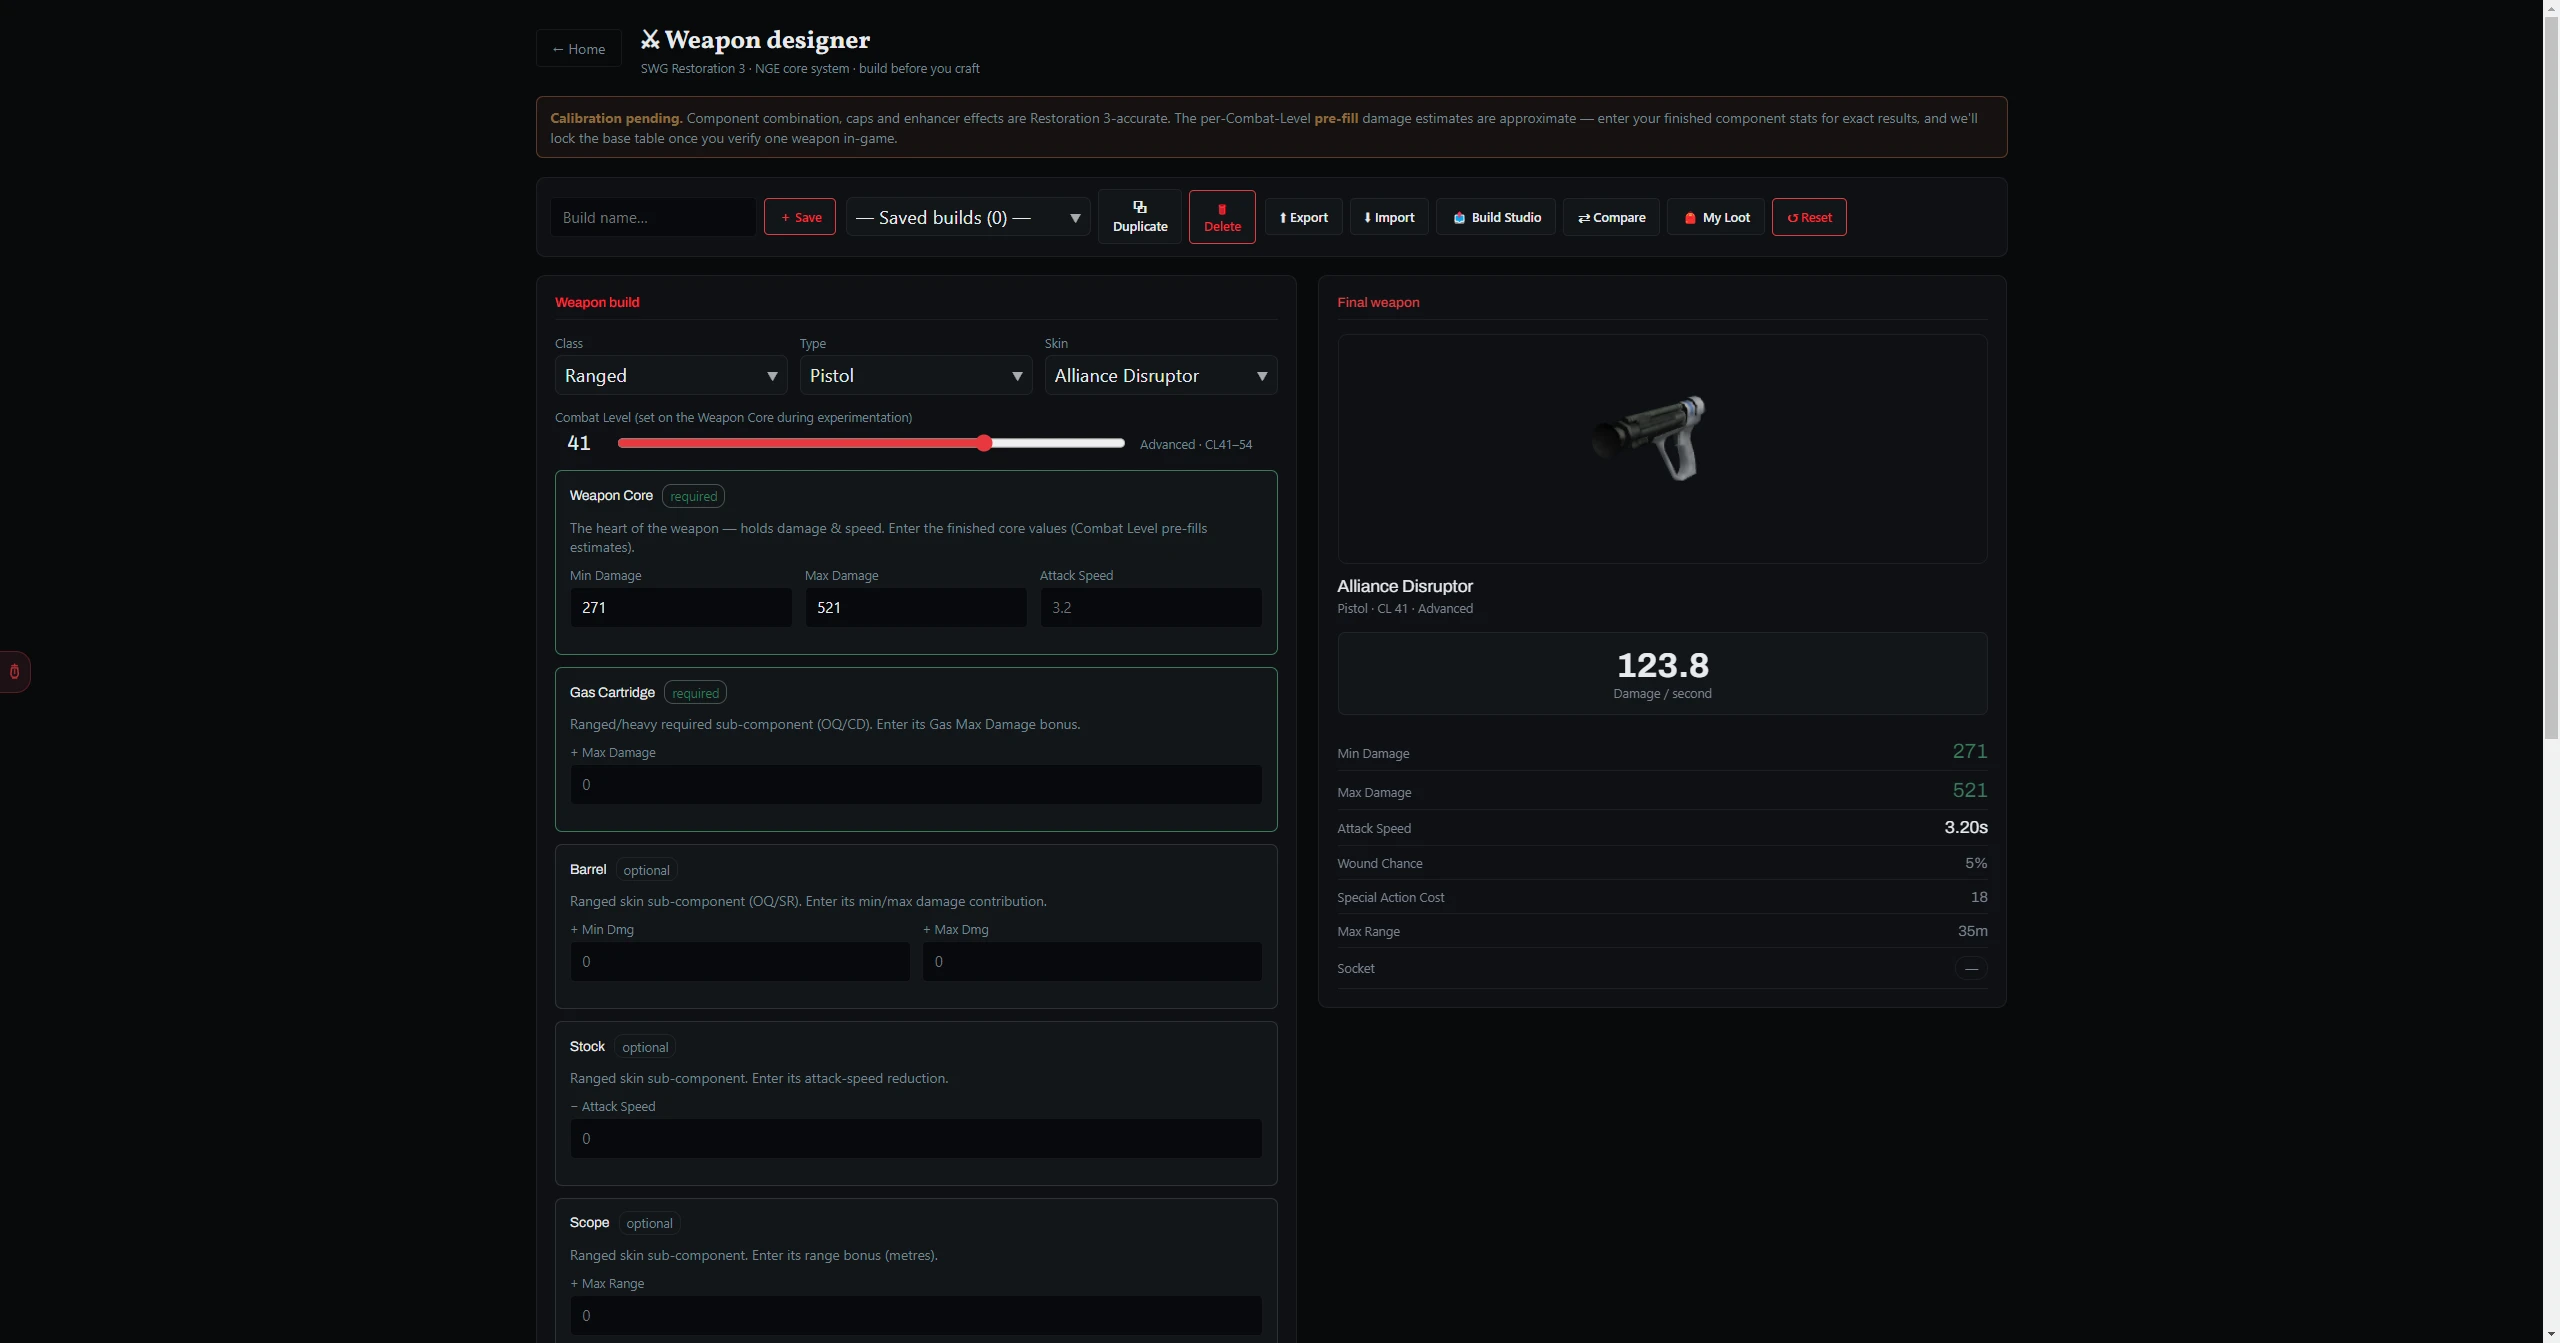
Building a Weapon
- Select a Class (Ranged, Melee, Heavy). Type and Skin dropdowns update to match.
- Select a Type (e.g. Pistol, Rifle, One-handed Sword). Component slots change to match.
- Select a Skin — the specific schematic this weapon comes from.
- Drag the Combat Level slider (6–54). The tool pre-fills estimated min/max damage — you can override with your actual core stats.
- Fill in the stats for each component slot. The slots depend on the weapon: a Weapon Core, the type-specific crafted parts (e.g. Barrel, Stock, Scope, Vibration Generator, Gas Cartridge, Elemental Chamber), the looted slots (Augmentation, Enhancement, Weapon Enhancement), and a Weapon Power Bit. Looted slots offer Quality preset dropdowns plus a Custom… option.
- Enter your Weapon Assembly skill level. 151+ guarantees a socket. The result panel shows the socket probability.
- The Final Weapon panel on the right updates live as you type.
Note: The per-CL damage estimates are pre-fills for planning. They are replaced the moment you type your own core values. A field you have manually edited is "touched" and will not be overwritten if you move the CL slider.
My Loot Library
- Click 🎒 My Loot in the toolbar to open the library overlay.
- Select the Slot — Augmentation (Health/Action), Enhancement (Crit), or Weapon Enhancement.
- Optionally enter a Name, then fill in the stat fields.
- Click + Add to library. The item is saved.
- In the main build, open the matching slot's dropdown. The item appears under a My Loot group, listed below the Quality presets group.
Saving & Managing Builds
| Button | What it does |
|---|---|
| + Save | Saves the current build under the name you typed. Each save adds a new entry to the saved builds list — it does not overwrite an existing build with the same name. |
| Saved builds dropdown | Lists all saved builds. Select one to load it. |
| ⧉ Duplicate | Creates a copy with " (copy)" appended to the name. |
| 🗑 Delete | Permanently deletes the currently selected build. Cannot be undone. |
| ⬆ Export | Saves the current build as a .bwpn file for sharing or backup. |
| ⬇ Import | Loads a .bwpn file and adds it to your saved builds list. |
| ↺ Reset | Clears all component fields back to blank without deleting any saved builds. |
Compare Mode
- Pick a saved build from the dropdown, then click ⇄ Compare. The result panel splits into two columns: CURRENT (the build you're editing) and PINNED (the saved build you chose).
- The two stat cards sit side by side so you can read the differences line by line.
- Click ⇄ Compare again to exit and return to the single-build view.