The Kith Guide › Character management
📊 Sales Ledger
Turn in-game mail into a searchable history of every vendor sale, auction and purchase.
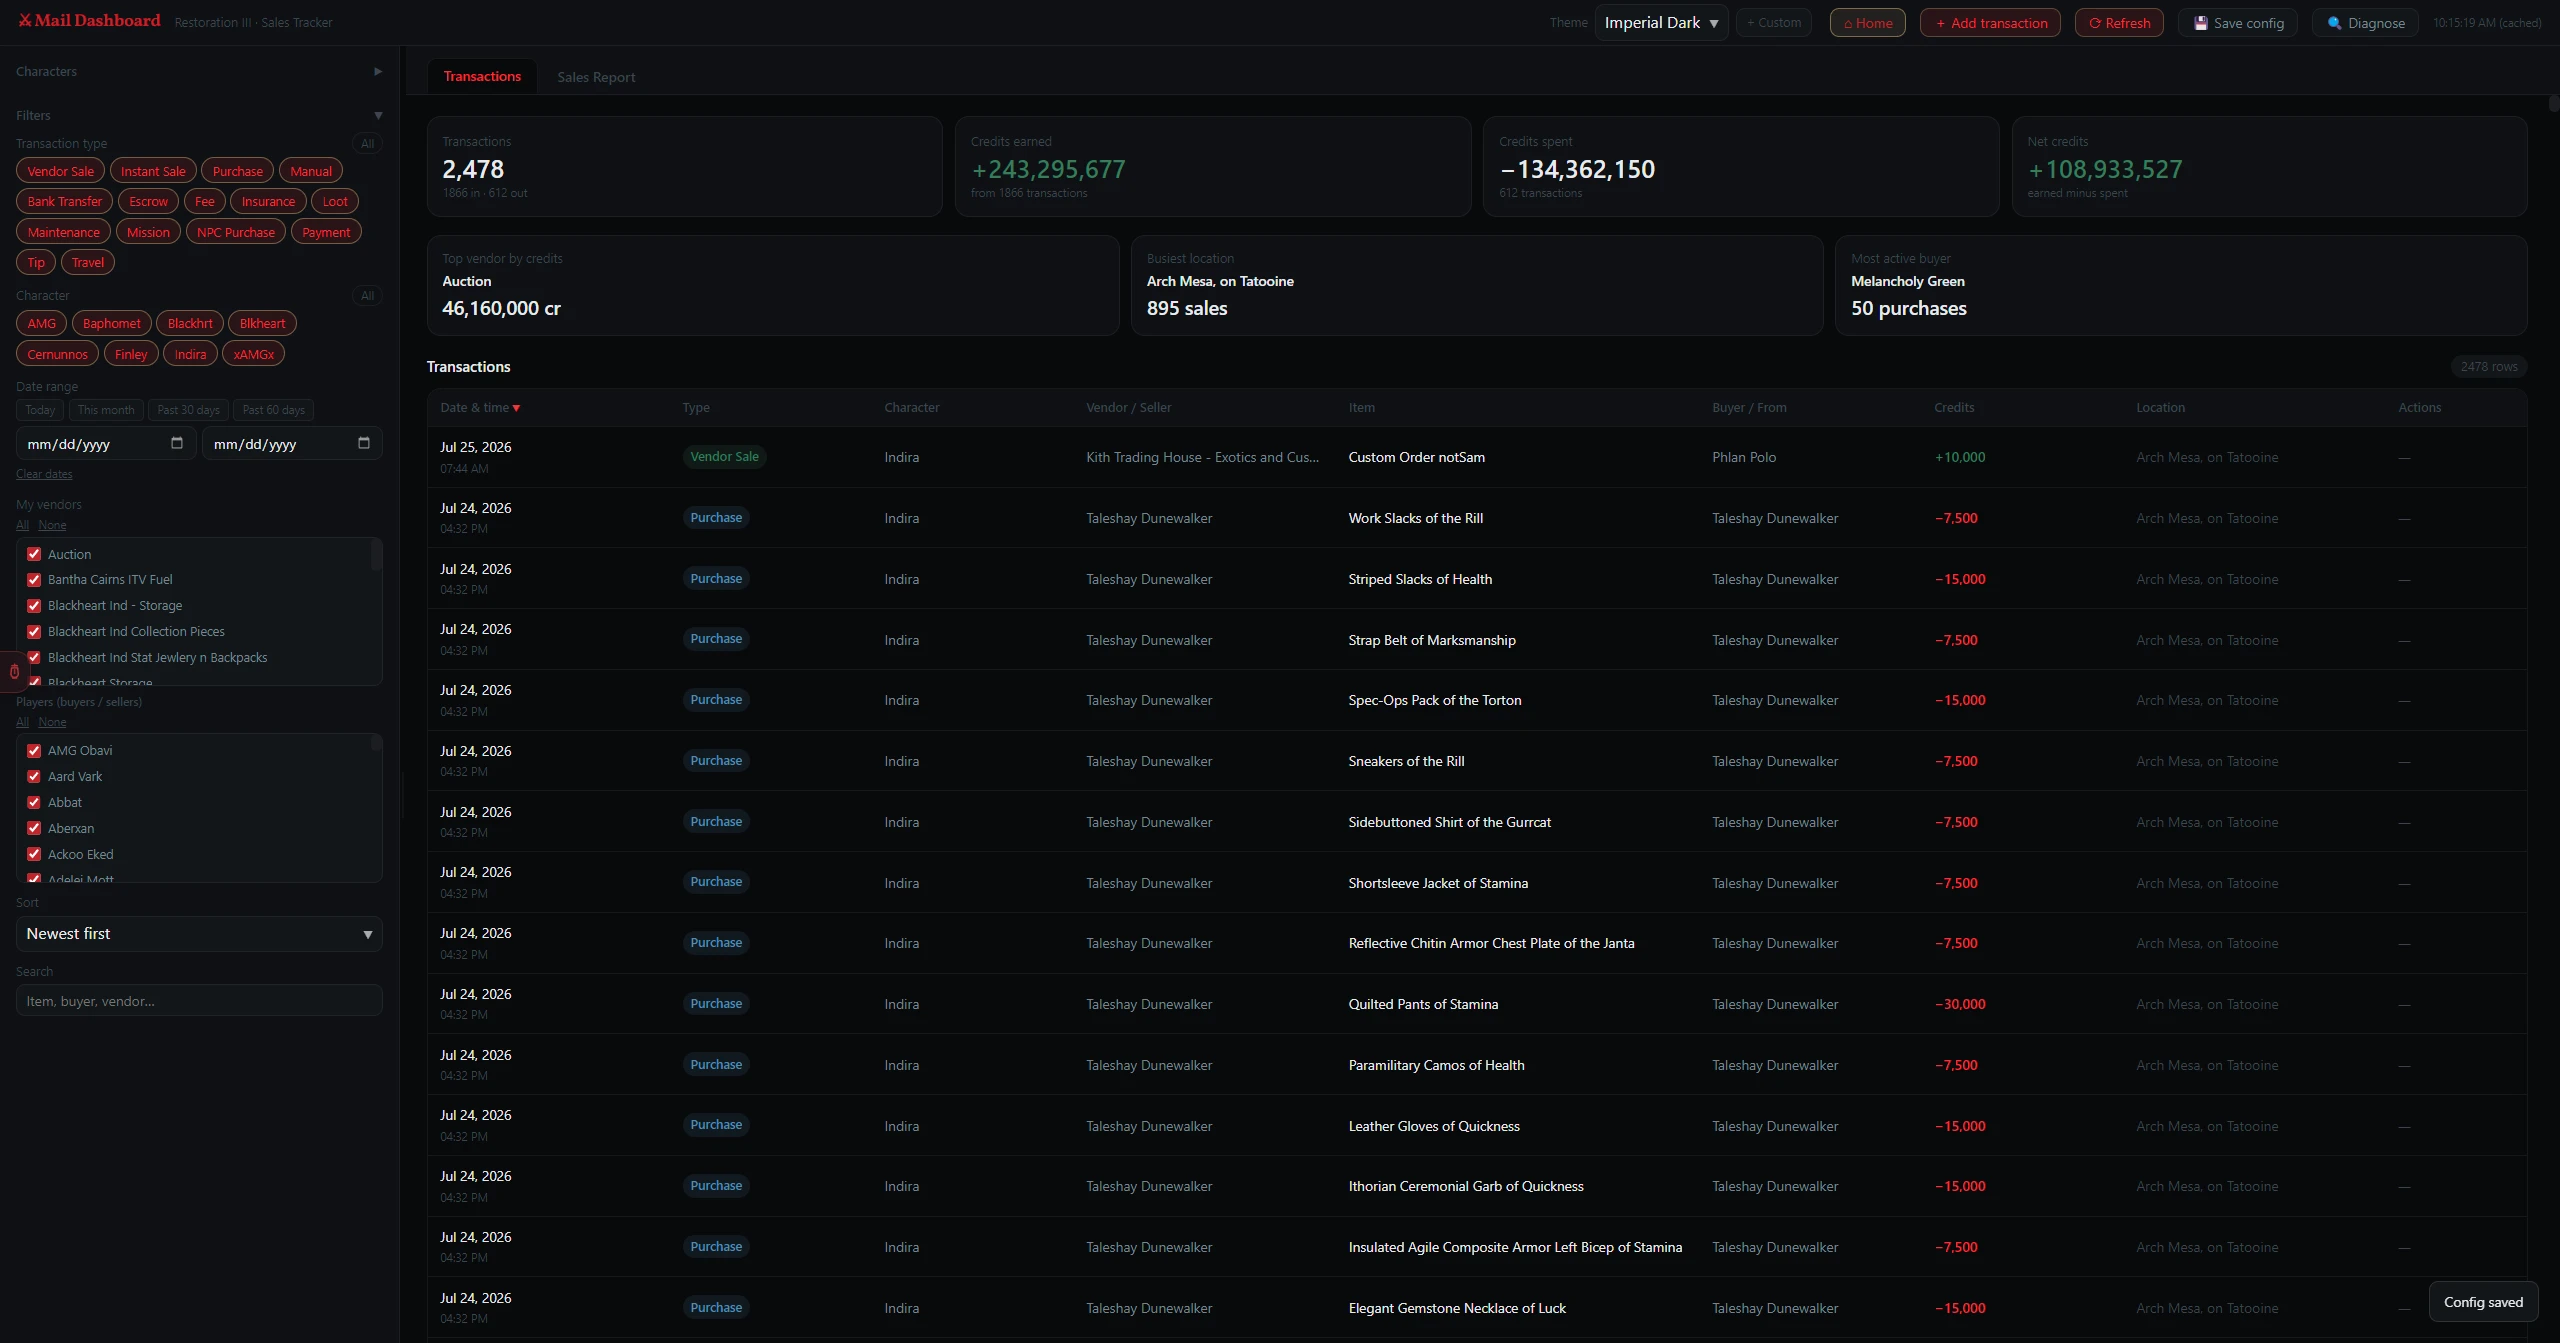
The Sales Ledger reads your SWG in-game mail files and turns vendor sale confirmations into a searchable transaction history with charts, reports, and month-over-month analysis. Connect one or more characters, run a Refresh, and every sale becomes a data point.
- Open Sales Ledger (hotkey
Son the Home Screen). - In the left sidebar, click + Add character.
- Enter a name for this character (just a label for your reference).
- Click Browse next to the path field and select that character's mail folder inside your SWG profile (the folder that contains the individual
.mailfiles) — not a single file. - A green dot appears when the folder is valid and its mail is readable.
- Click Refresh in the top bar to import all mail. The transaction table will populate.
A typical path is C:\SWG Restoration\x64\profiles\<your account>\Restoration\mail_<Name>. Start at your actual game installation, open x64 → profiles → your game account → Restoration, then choose the character's mail folder containing .mail files. The drive and installation name may differ. See finding your game folder if you are unsure where to start.
Mail folders and chat logs are different inputs. Sales Ledger reads the files inside the mail folder; Account → Game chat logs uses the parent Restoration folder for the LFG watcher. Creating a Character Profile does not select either folder. After setup, use Save config to retain mail paths and Refresh to read new mail.
| Button | Where | What it does |
|---|---|---|
| ⟳ Refresh | Top bar | Re-reads all linked mail files and imports new transactions. Run this after logging out of SWG to capture recent sales. |
| 💾 Save config | Characters section, under + Add character | Saves your linked characters and folder paths so they reload next time you open the ledger. |
| + Add transaction | Transactions tab, above the table | Opens the manual transaction form to log a credit sale or purchase that doesn't appear in mail. |
| Filter | How to use it |
|---|---|
| Type pills | Click Vendor Sale, Instant Sale, Purchase, or Manual to show only that type. Multiple pills can be active at once. |
| Date presets | Quick-select buttons — Today, This month, Past 30 days, Past 60 days — set the date range instantly. |
| Date range | Enter a From and To date to show only transactions in that window. |
| My vendors / Players | Two multi-select lists — My vendors and Players (buyers / sellers) — built from your mail. Each has its own All / None buttons. |
| Character | Pills built from your linked characters — click one to show only that character's transactions. Has its own All button. |
| Sort | Orders the table — Newest first, Oldest first, Highest credits, or Lowest credits. |
| Search | Filters by any text — item name, vendor name, player name, or notes. |
Click any column header to sort. Click again to reverse. A ▲ or ▼ shows which column is sorted. Manual transactions show edit (✎) and delete (🗑) icons on the right; imported mail rows show a dash there.
- On the Transactions tab, click + Add transaction above the table.
- Select direction: + Credits in (earned) or − Credits out (spent).
- Pick the Character, then enter the Credits amount, Item, Vendor / Seller, Buyer / From, optional Location, and the Date & time.
- Click Save transaction. The transaction appears tagged "Manual" with a purple badge.
| Report | What it shows |
|---|---|
| Best selling items | Items ranked by total credits earned, with a bar graph and per-item sale count. |
| Vendor performance | Your vendors ranked by total revenue. |
| Vendor location performance | Vendor locations ranked by total revenue. |
| Character performance | Your characters ranked by total revenue. |
| Month over month — vendor sales | One row per vendor, one column per month, showing the change versus the previous month. |
Use Rank by (Total credits / Number of sales) and Show top (20 / 50 / All) to control how each ranking is computed and how many rows appear. Click 📋 Export for Discord to copy the report as a formatted text block.